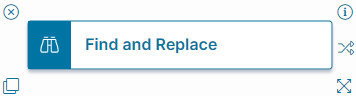
Find and Replace Quick Action
•About the Find and Replace Quick Action
•Classic Action Designer: Find and Replace Quick Action
About the Find and Replace Quick Action
The Find and Replace Quick Action evaluates the selected records or all records for any instances of the specified field that contain the specified current value. When it finds that field and current value, it replaces the current value with the new value. You can replace values in an individual incident, multiple selected incidents, or all incidents simultaneously.
The Find and Replace Quick Action is not supported within composite actions, it can only be used as a stand-alone action. When creating a composite action, the Find and Replace Quick Action template is disabled in the New Actions list on the Graphical Action Designer.
The Find and Replace Quick Action function is limited to a maximum of 100 records.
Some fields do not support Find and Replace.
Suggestions for Use
Here are a few ways you can use the Find and Replace Quick Action:
•Replacing the Incident owner's name: For example: If a technician leaves the company, you can find all issues currently assigned to him or her as owner, and replace the value in owner field with a new technician's name.
•Change the impact of incidents: For example, you can make a change to a group of Incident records when Impact was previously Medium and it is now Low or High.
Parameters
To access the parameters select the Action Block to display them in the Settings pane.
Action Block Settings
-
Block Label: A unique name for the block. This is useful to identify each action when you have more than one of the same action block added or cloned in the design area.
-
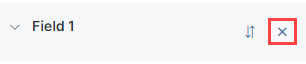
Click
 to add two fields:
 -
Field 1 where the user is prompted to enter a value to search for when running the Find and Replace Quick Action.
-
Field 2 where the user is prompted to enter a value to replace.
-
-
To delete a field, click the X next to the field label.
Click Save to commit your changes.
Start Block Settings
These settings are accessed by selecting the Start Block, refer to Start Block Settings.
This action does not respect the Auto-save checkbox option in the Start Block settings. It does save changes directly to the database, but please ensure that the behaviour you expect still occurs.